Preoperative preparation and position as previously described for transarticular external frame fixation.
Intra-articular fracture repositioning and fixation:
Limited incisional reduction and fixation is used. The fracture of the inferior articular surface can be visualised directly through small anteromedial and anterolateral incisions and lateral incision of the joint capsule below the meniscus.
Traction of the affected limb and use of ligaments to straighten the large bone fragments, and intermediate compression can be reset by prying and plucking.
Pay attention to restoring the width of the tibial plateau, and when there is a bone defect below the articular surface, perform bone grafting to support the articular surface after prying to reset the articular surface.
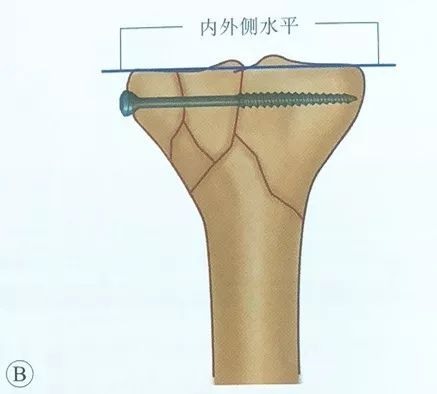
Pay attention to the height of the medial and lateral platforms, so that there is no articular surface step.
Temporary fixation with a reset clamp or Kirschner pin is used to maintain the reset.
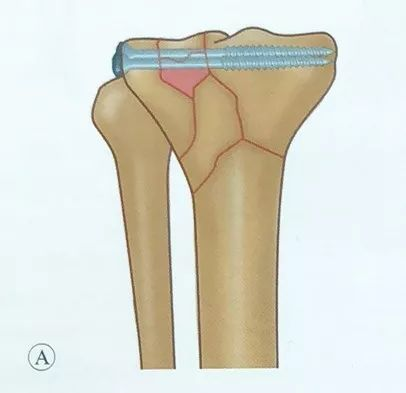
Placement of hollow screws, screws should be parallel to the articular surface and located in the subchondral bone, in order to increase the strength of fixation. Intraoperative X-ray fluoroscopy should be performed to check the screws and never drive the screws into the joint.
Epiphyseal fracture repositioning:
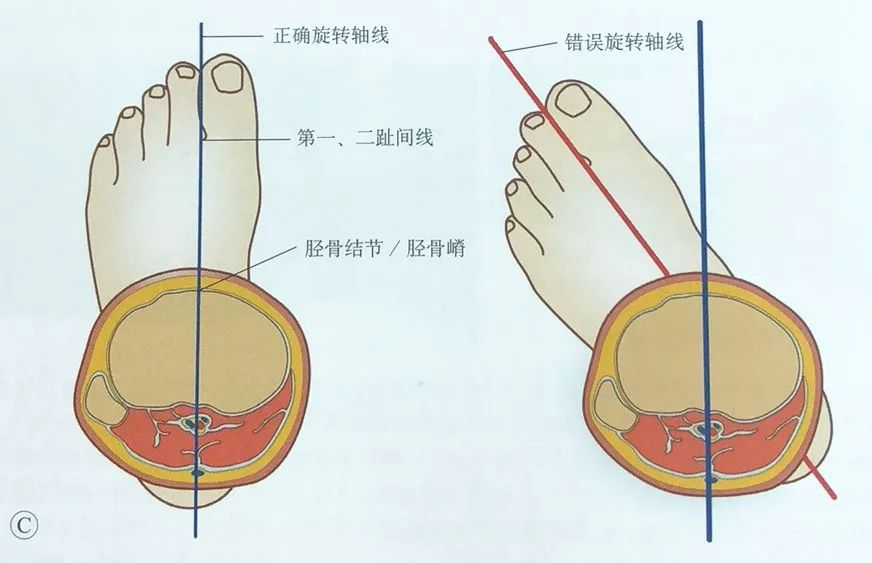
Traction restores the length and mechanical axis of the affected limb.
Care is taken to correct rotational displacement of the affected limb by palpating the tibial tuberosity and orientating it between the first and second toes.
Proximal Ring Placement
Range of safe zones for tibial plateau tension wire placement:
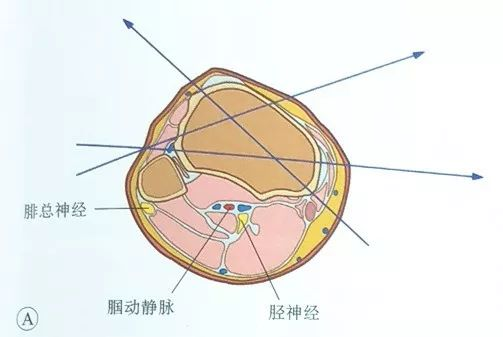
The popliteal artery, popliteal vein and tibial nerve run posterior to the tibia, and the common peroneal nerve runs posterior to the fibular head. Therefore, both entry and exit of the needle should be done anterior to the tibial plateau, i.e., the needle should enter and exit the steel needle anterior to the medial border of the tibia and anterior to the anterior border of the fibula.
On the lateral side, the needle can be inserted from the anterior edge of the fibula and passed out from the anteromedial side or from the medial side; the medial entry point is usually at the medial edge of the tibial plateau and its anterior side, to avoid the tension wire to pass through more muscle tissue.
It has been reported in the literature that the entry point of the tension wire should be at least 14 mm from the articular surface to prevent the tension wire from entering the joint capsule and causing infectious arthritis.
Place the first tension wire:
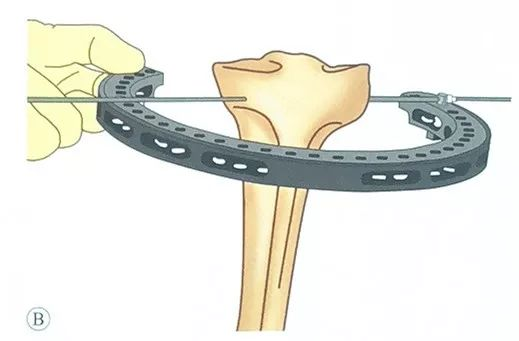
An olive pin may be used, which is passed through the safety pin on the ring holder, leaving the olive head on the outside of the safety pin.
The assistant maintains the position of the ring holder so that it is parallel to the articular surface.
Drill the olive pin through the soft tissue and through the tibial plateau, taking care to control its direction to ensure that the entry and exit points are in the same plane.
After exiting the skin from the contralateral side continue to exit the needle until the olive head contacts the safety pin.
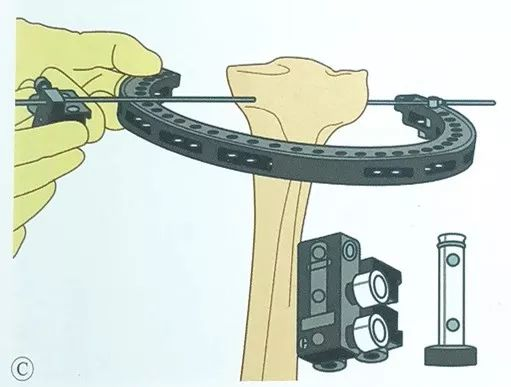
Install the wire clamp slide on the contralateral side and pass the olive pin through the wire clamp slide.
Take care to keep the tibial plateau in the centre of the ring frame at all times during the operation.

Through the guide, a second tension wire is placed in parallel, also through the opposite side of the wire clamp slide.
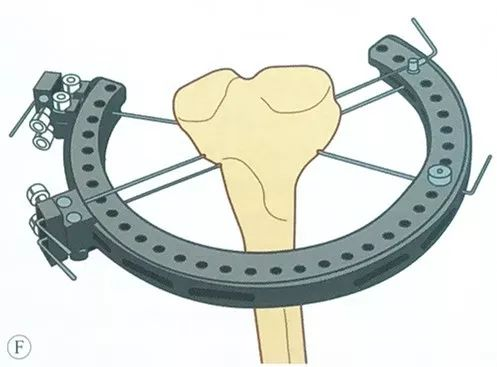
Place the third tension wire, should be in a safe range as far as possible with the previous set of tension wire cross into the largest angle, usually two sets of steel wire can be an angle of 50 ° ~ 70 °.
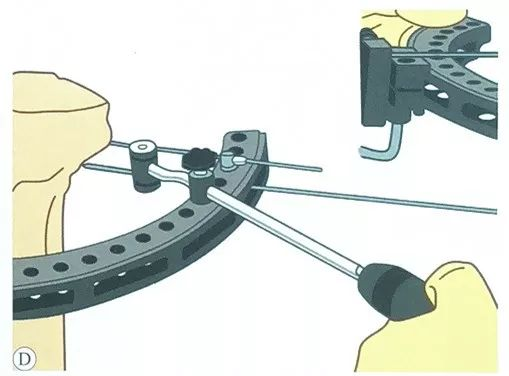
Preload applied to the tension wire:Fully tension the tightener, pass the tip of the tension wire through the tightener, compress the handle, apply a preload of at least 1200N to the tension wire, and then apply the L-handle lock.
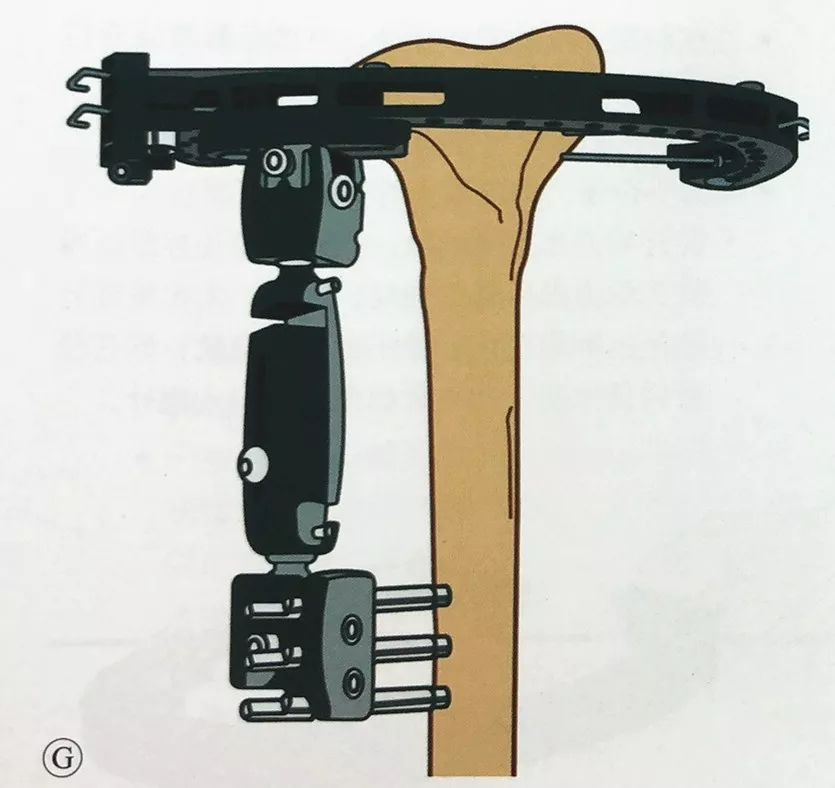
Applying the same method of external fixation across the knee as described previously, place at least two Schanz screws in the distal tibia, attach the single-armed external fixator, and connect it to the circumferential external fixator, and reconfirm that the metaphysis and tibial stem are in normal mechanical axis and rotational alignment before completing fixation.
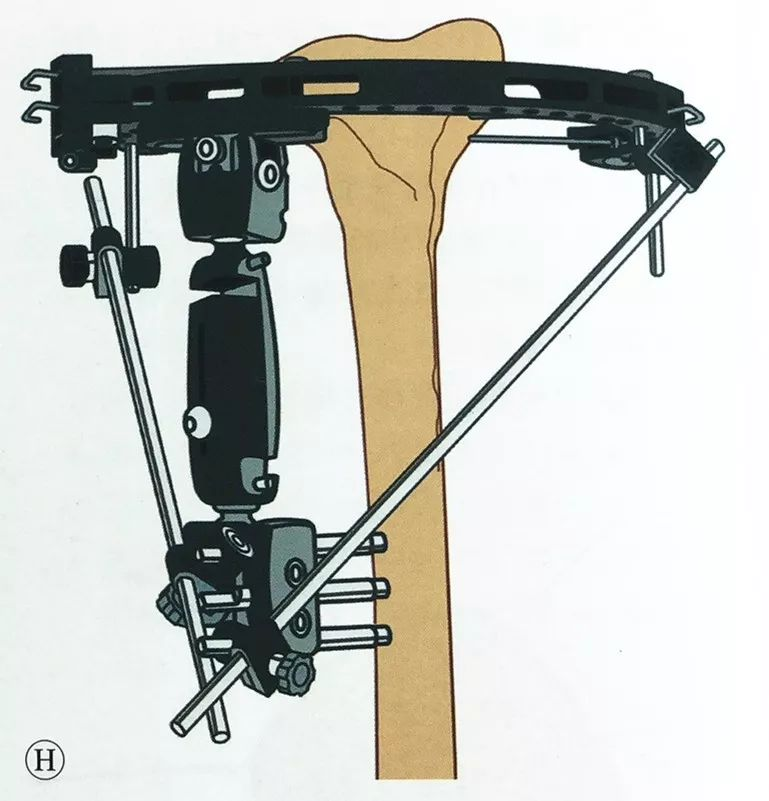
If further stability is required, the ring frame can be attached to the external fixation arm with a connecting rod.
Closing the incision
The surgical incision is closed layer by layer.
The needle tract is protected with alcohol gauze wraps.
Postoperative management
Fascial syndrome and nerve injury
Within 48h after the injury, care should be taken to observe and determine the presence of fascial compartment syndrome.
Carefully observe the vascular nerves of the affected limb. Impaired blood supply or progressive neurological loss must be managed appropriately as an emergency situation.
Functional rehabilitation
Functional exercises can be started on the first postoperative day if there are no other site injuries or comorbidities. For example, isometric contraction of the quadriceps and passive movement of the knee and active movement of the ankle.
The purpose of early active and passive activities is to obtain the maximum range of motion of the knee joint for as short a time as possible after surgery, i.e., to obtain the full range of motion of the knee joint as much as possible in 4~6 weeks. In general, the surgery is able to achieve the purpose of knee stability reconstruction, allowing early
activity. If functional exercises are delayed because of waiting for swelling to subside, this will not be conducive to functional recovery.
Weight-bearing: Early weight-bearing is generally not advocated, but at least 10 to 12 weeks or later for designed intra-articular fractures.
Wound healing: Closely observe the wound healing within 2 weeks after surgery. If wound infection or delayed healing occurs, surgical intervention should be performed as soon as possible.
Post time: Aug-16-2024